Lab 6
Part 1 : Home on the range()
We have previously seen the idea of a “for-loop”: a special syntax for repeating some block of statements a given number of times. Here is a simple example that prints three cheers:
Today we want to start looking more carefully at loops like this. Start by stepping through the above example in codelens. The first thing to notice is that the variable count starts out at zero, then takes on value 1, then takes on the value 2. That is actually why the loop statements execute three times.
A range in Python is really just a list of numbers. range(3) is just the list [0, 1, 2], that is, the range of numbers from 0 up to (but not including) 3.
The range() function also can take more than one argument as well. For example, if you
want to make a list from 5 through 10 we can simply call range(5, 11). Notice how the
list stops before it reaches 11, the second number. range(3) is shorthand for
range(0, 3); that is, the first value is 0 by default.
If we add a third argument, it indicates the step between successive values.
For example range(0, 10, 2), counts to 8 by increments of 2. Again, the list stops without including the second bound.
Try the following examples. (In these examples, in order to see the individual elements in a range in Python 3, we have to convert it to an actual list of numbers, using the conversion function list().)
For checkpoint 1, write range expressions to generate the following lists.
Part 2 : Loop-de-loop
Now that we can print out a list of numbers, let’s use the for
keyword to iterate over our list. The word iterate simple means to
go over a list of elements sequentially. For example, the following
prints out 10 numbers on new lines.
Is it possible to make a list of things that aren’t numbers? Yes. You can create a list of any values in Python just by enclosing items, separated by commas, within the square brackets. We can iterate over the list using a for-loop. The loop variable takes on the next list value in each iteration (repetition) of the loop body. The loop below executes three times, once for each name in the list.
You’ll want to use loops when working with turtles because there are lots of repetitive actions. One example we have seen is drawing a square: we need to repeat the action of moving forward and turning left, four times:
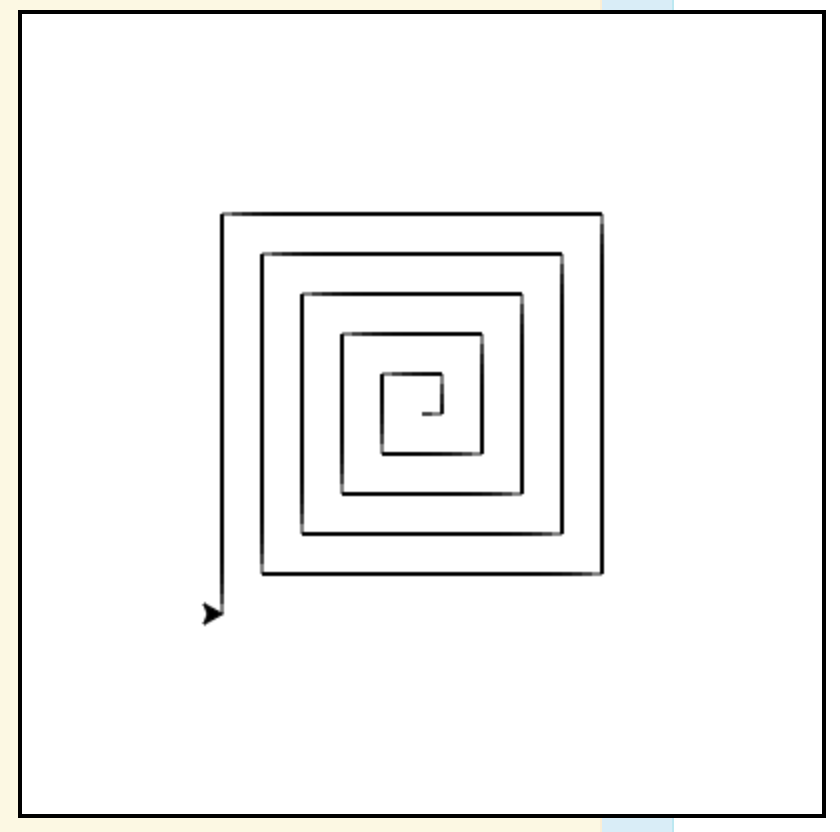
Checkpoint 2
- Write a loop that prints out numbers counting backwards from 100 by 7’s.
- Write a loop that makes a “square spiral” like the one pictured below. First imagine you are doing it without a loop:
alex.forward(10)
alex.left(90)
alex.forward(20)
alex.left(90)
alex.forward(30)
alex.left(90)
alex.forward(40)
alex.left(90)
...and so on...
Then, can you make a range that lists the numbers 10, 20, 30, 40, and so on?
Part 3 : It’s Turtles all the way down
Instead of a square, how about a polygon with ten sides? We just need to determine the “turn” angle for the turtle. Fortunately, we remember that the interior angle of a regular polygon with n sides is always 180 * (n - 2) / n degrees. Therefore, the amount the turtle needs to turn is the complement of that angle (subtract from 180).
There are many more operations on turtles besides the ones we’ve seen.
Take a look at
this chapter of the *Think Like a Computer Scientist* textbook. There is also
a nice summary of turtle methods here.
In particular, look at the functions up(), down(), goto(), begin_fill(), fill() and pensize()
Let’s try to print a dashed line in turtle. Using up() and down()
we can “pick up” the pen.
Next, we’ll work on a slightly more fun example using fill()
Essentially, we call begin_fill() when we want to start filling
our shape, then after we move around a bit, we call fill() to
to fill in the space that has been travelled.
Using up(), down(), and goto() we can start a drawing anywhere in the screen. By default, (0, 0) is the center of the screen.
For example, goto(10, 20) will position the turtle 10 pixels to the right of the center and 20 pixels up. If the pen is down, it will draw a line there too.
If you need to know the size of the screen you can call wn.window_width() and wn.window_height(). Then your range of x-coordinates is from -width/2 to width/2 from
left to right, and the range of y-coordinates is from -height/2 to height/2, from
bottom to top.
Checkpoint 3
Write code that creates the red X like this one

Keep the ends of your lines about 20 pixels away from the corners.
Checkpoint 4
Make a polygon “star” by adding an equilateral triangle on each edge, as pictured below:
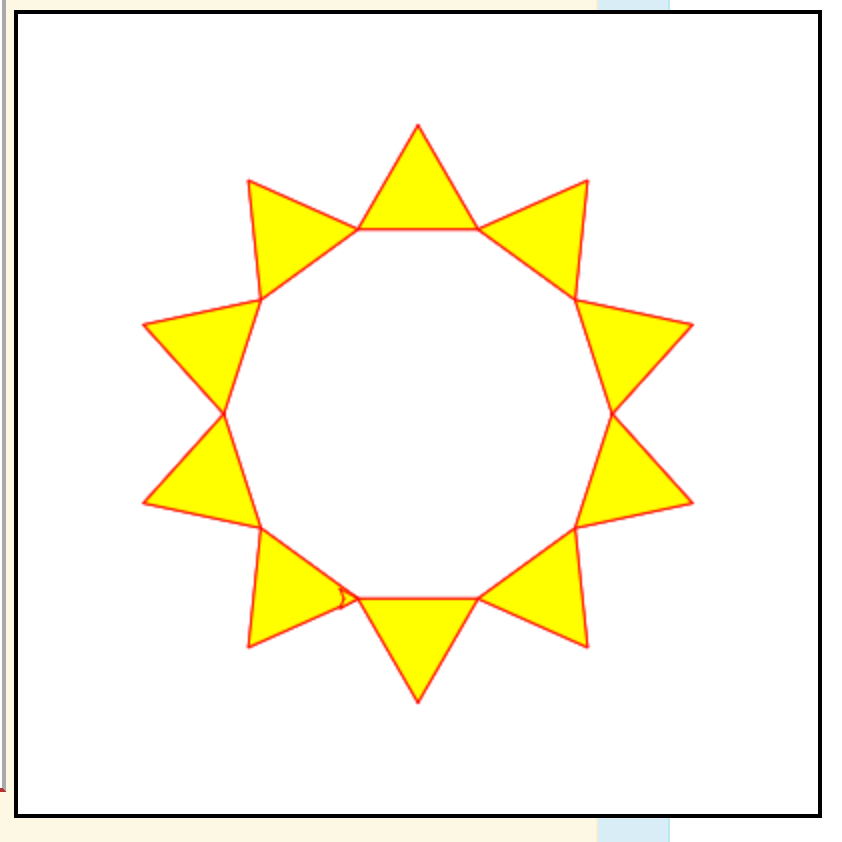
After you turn, but before you draw the side, you need to draw a filled triangle. Sketch out the path your turtle should take. If all goes to plan you should have a shape that looks like a star. Make it so that the user can enter the length of the sides and the number of sides.
To center the polygon as in the picture, we need a tiny bit of trigonometry. You use the code. If size is the length of the sides, and a is the interior angle, then the starting x and y-coordinates should be
start_x = -size / 2
start_y = -size / 2 * math.tan(math.radians(a / 2))
Then you can go to that position with goto(start_x, start_y).